PS5 software beta unlocks a range of cool new features, including the ability to expand your console’s stock 825GB internal hard drive. You would need to purchase an additional M.2 SSD first, but many owners with large libraries see this as worthwhile, since a secondary SSD doesn’t only increase storage space, but also leads to improved loading times.
(For those who don’t know, solid state drives are a kind of storage device used in computers, mainly to replace traditional hard disk drives and perform the same basic functions as a hard drive. With an SSD, the device’s operating system will boot up more rapidly, programs will load quicker and files can be saved faster)
PS5 SSD expansion requirements
PS5 games can only be played from the PlayStation 5’s internal storage or from a compatible M.2 SSD that has been installed in the console’s SSD bay. Thus, to upgrade your PS5, the first thing you need to do is to get your hands on a compatible solid-state drive (SSD).
Sony has said that any solid state drive you purchase must meet the following requirements:
| Format | PCIe Gen 4.0 (x4) M.2 NVMe SSD |
| Capacity | 250GB, 500GB, 1Tb, 2TB or 4TB |
| Read Speed | 5500MB/s or faster |
| Total size with heatsink | 110 x 25 x 11.25 millimetres |
| Form Factor | 2230, 2242, 2260, 2280 or 22110 |
| Heatstink | Required |
Sony also points out that your SSD needs to have some form of cooling structure, such as a heatsink. This is a very important requirement. Do not attempt to install an SSD without any form of cooling as the drive will run hot and could damage your PS5 if it can’t maintain a stable temperature.
Attaching a heatsink could take your chosen SSD over the size requirements. So you need to be mindful of this. The drive with the heatsink attached cannot be any bigger than 25mm wide and 11.25mm high to fit within the PS5’s internal expansion slot.
How to add an M.2 SSD to a PS5 console
What you’ll need:
- A well-lit room with a table to work on.
- A #1 Phillips or cross-head screwdriver.
- A small flashlight (optional).
Here’s how the process is done, according to Tom’s Guide.
1. Place your console on a flat surface upside down. The etched PlayStation logo on the top of the console should be facing downwards. Make sure any cables are fully disconnected before beginning the process.
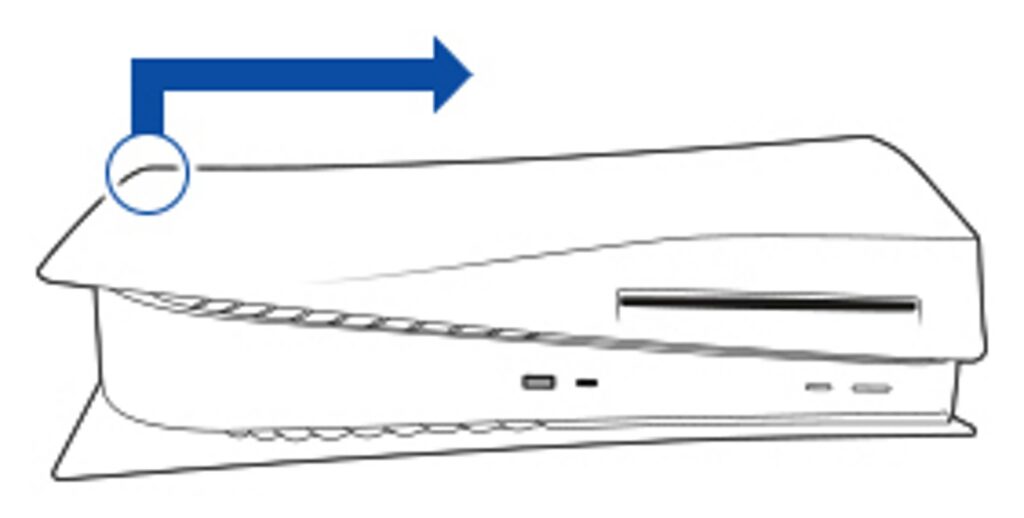
2. Now you need to slide off the bottom PS5 cover plate. Place your palms near the top corners and grip the edge of the cover. Gently pull the cover plate up and towards yourself. If you hear a click, that’s normal.

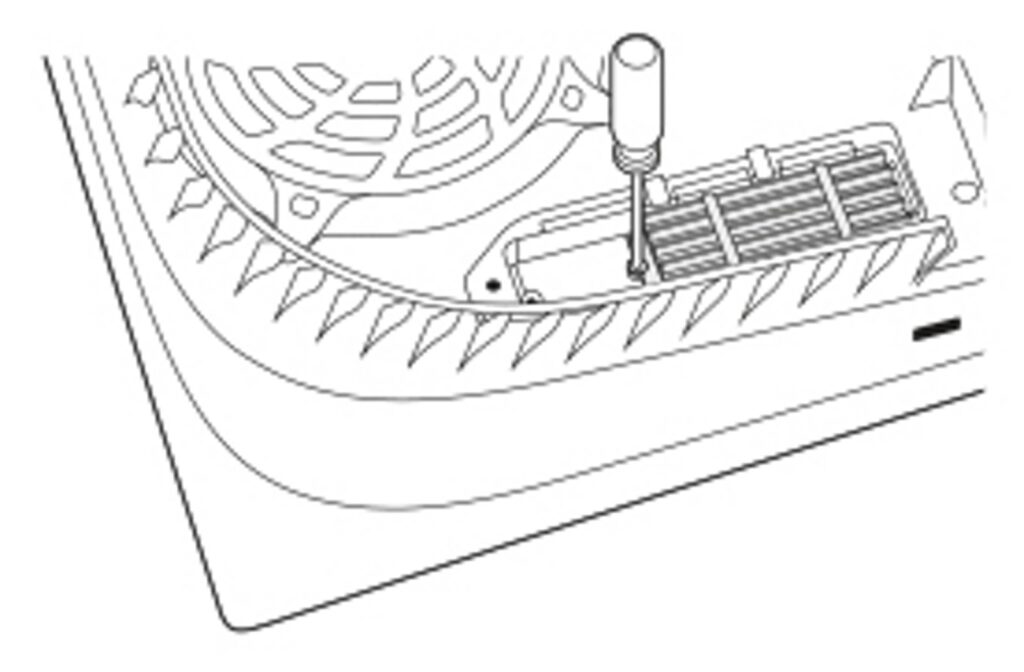
3. With the cover plate removed, remove the screw from the expansion slot cover and then remove the cover itself.
4. Remove the screw underneath and spacer. Adjust the spacer to the size of your M.2 SSD.
5. Hold the edge of your M.2 SSD, align it with the connector, and then starting from diagonally upward firmly insert your SSD all the way in.
6. Title your M.2 SSD down and fasten it with screws.

7. Reattach the expansion slot cover and fasten the screw. Also, reattach the PS5 bottom cover plate by sliding it back into place. You’ll hear a click when the cover is secured.
8. Reconnect the power cord and HDMI cable and switch on your PS5. A formatting guide should appear automatically. Follow the onscreen instruction to format your M.2 SSD.
Click here to learn more about PS5 updates and everything you need to know about keeping your PS5 up-to-date.
As of now, only select players in the U.S., Canada, Japan, U.K., Germany and France have access to these features, but once beta testing is complete, all PS5 owners will have access. Expect an official PS5 update with these upgrades in the coming weeks.